PART 1: Featured Training

Welcome back to the Rugby Fitness Blog.
After a number of questions and interest surrounding the topic of “acceleration” following last month’s fitness blog on “Power and Explosiveness”, this month’s blog aims to show you some more exercises that can improve your acceleration – whether you are a forward or a back.
I have dragged a familiar face (Ryan Brend) back in front of the camera to demonstrate these exercises. I also want to congratulate Ryan on his recent Gloucester “A” team appearances, as his hard work at training is certainly paying off this season.
Acceleration Explained
If you watch highlights from the last Rugby Six Nations you can see how vital acceleration over short distances can be. Not only are tries being scored as a result of players’ quickness, but in defensive situations teams can eliminate attacks as a result of quick line speed.
Research has found that the average distance covered during a single sprint in a rugby match is approximately 20m and this distance is similar for both forwards and backs. Accordingly, with the ability to accelerate to maximuim velocity in the shortest period of time, a player will have a definitive advantage over their opponent on the field.
In scientific terms, Newton’s 2nd Law states that when a force is applied to mass, if the force is greater than the mass, acceleration will occur. Thus: Acceleration = Force / Mass. Relating this to rugby, there are two options to improve your acceleration:
1. Decrease body mass. However, unless you are carrying unnecessary fat, this might be disadvantageous in rugby as it will decrease momentum and there is a rationale for larger body mass at the elite level.
2. Increase force production and efficiency of movement. In a lot of cases this is the most effective option and can be combined with decreasing body mass as well.
This blog will help you achieve better acceleration by developing efficient movement patterns and increasing force production in these movements. The exercises below will not only contribute to ending your season with a bang but prepare you for the 7’s season around the corner.
PART 2: Training Techniques
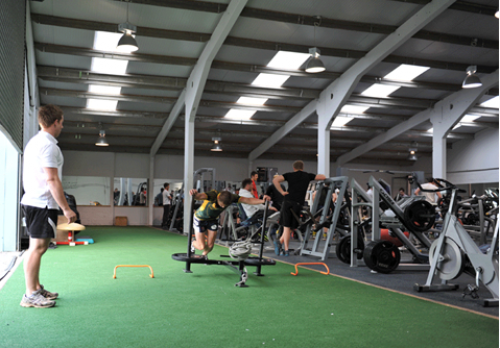
In terms of equipment for this exercise series, I have taken a minimalistic approach. However, for those of you with access to fancy bits of kit, I have included exercises including the prowler/sled.
In regard to footwear, what you should wear will obviously depend on whether you are training on the field or indoors. Where you train does not make too much of a difference here – the great thing is that these exercise can be done in most places. Now, lets get to it…
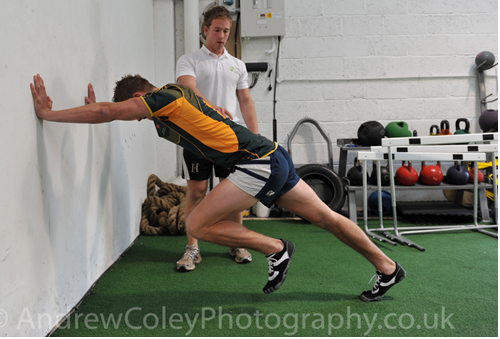
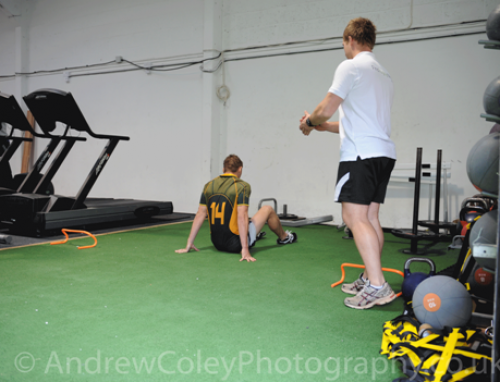
1a. Explosive wall drive
This exercise is an effective way of learning the correct mechanics for explosive acceleration over the first few metres of the sprint. When carrying out this exercise ensure that you are not on a hard surface as there is a lot of impact with the floor.
This body position not only develops your acceleration movement pattern but also works on the driving position required for mauls and tackling – win-win!
- Ensure that you are at a 45-degree angle, with feet shoulder width apart;
- Your heels should be slightly off the ground to ensure the sprint is utilizing your forward momentum;
- Your energy should be transferred through the whole body, with a parallel line ranging from the heel upwards (In the picture above I am telling Ryan to drop his hips towards the ground a little to ensure that alignment is in place);
- This movement utilizes the force production required when landing and pushing back off the ground. When trying the exercise, try transferring from one foot to the other as quickly as possible and then rest. Eventually develop this movement into 2 changes then 3 and so on.
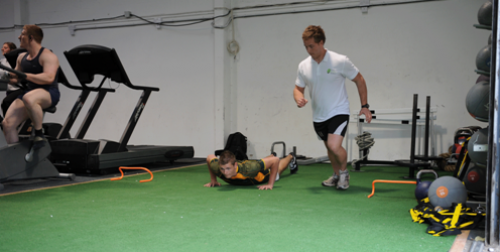
1b. Partner/prowler assisted explosive drive
The aim of this advancing “Explosive wall drive” is not only to drive the weight forwards but to focus on carrying out the movement pattern effectively when moving forwards.
In this example, Ryan is using a prowler, however, this can be done when leaning against a partner that is moving backwards with your leg drive, whilst facing you.
2a. 45-degree falling lunges
In order to practice getting into the 45-degree position for accelerating, this exercise has you to fall forwards to 45-degrees and then catch yourself in a lunge position. When carrying out this exercise use alternate legs for the lunge.
The energy-absorbing lunge will develop eccentric leg strength and also provide an opportunity to increase co-ordination in the movement itself. This movement is a necessary foundation exercise to the falling sprints below.
2b. 45-degree falling sprints
After you have practiced getting into the advantageous 45-degree body lean, the next step is to sprint from this position.
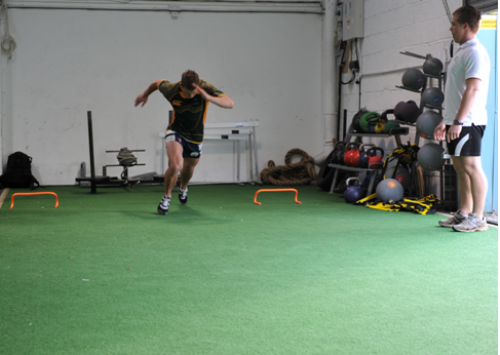
- Once your body is at a 45-degree angle, as opposed to lunging, drive forwards into a sprint for approximately 10m.
- While sprinting keep the shoulders relaxed and ensure the elbows are at a 90-degree angle, driving the elbows back and keeping them close to the body.
3a. Double leg bounds
Bounding works as a crucial plyometric exercise for acceleration development. This exercise will develop the mechanics required for an explosive off the mark sprint. For this exercise, try to generate as much full-body force as possible when bounding forwards.
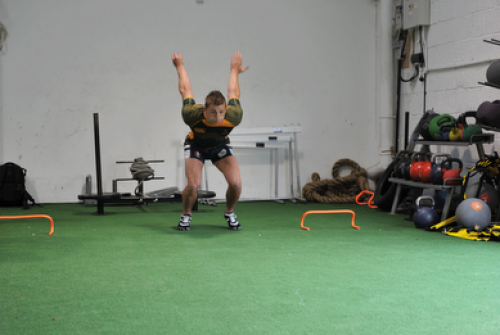
3b. Double leg bounds with object
Core stability should be a huge focus for any rugby player. The better your core strength is – the fewer problems you are likely to have in the future. Further to this, if you have a stong core you will be more efficient at a number of elements of the rugby game.
A great way of advancing the “Double leg bounds” is to introduce a rugby ball into the exercise. By holding the ball in both hands and carrying out the “Double leg bounds” there is more emphasis on core stability and the leg power component is more isolated. The trick is to ensure you are still developing that forward momentum and generating linear speed. If you find you are landing on your heels too much, you are adding a braking force and slowing down the movement. It may be best then to revert back to perfecting the bounds without a ball and come back to this advanced move once that exercise is perfected.
3c. Single leg bounds
Once you have become the master of “double leg bounds”, it is time to move onto “single leg bounds”. The obvious point to make is that the load is now higher.
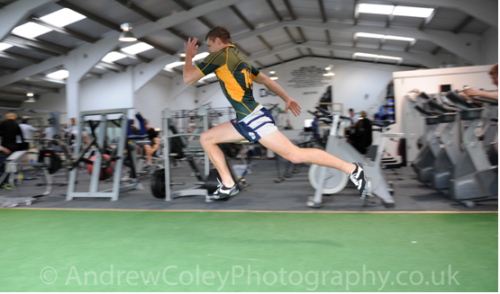
TRAINING TIP: I personally have found that mental imagery is really useful here. Picture yourself doing an extended sprint with the emphasis now being placed on driving yourself as far forward as possible with each stride. Making this sport specific, begin jogging and then move onto the “Single leg bounds” as though you are powerfully accelerating in a game.
In order to increase the demands of this movement even further you can carry out this exercise on the same leg for a number of repetitions. See Ryan do three bounds per leg below:
COACHING TIP: have your players carry out this exercise holding a light cone or object and at the end of their 3 bounds place the cone on the floor. This way they can try and beat their previous distance every time. I have often used this approach in team training sessions and as a simple comparison between right and left leg power in the movement. The best part about it is that is encourages more powerful leg drives in order to get greater distances and the result over time is an increase in leg power.
4. Resisted sprints
This is one of my favourite exercises. After using “Resisted sprints” training with a number of players I have witnessed exceptional results. Keep in mind that in rugby a player spends most of their game accelerating and very rarely reaches top speed. Having weight behind the player enables the 45-degree body lean to be stressed.
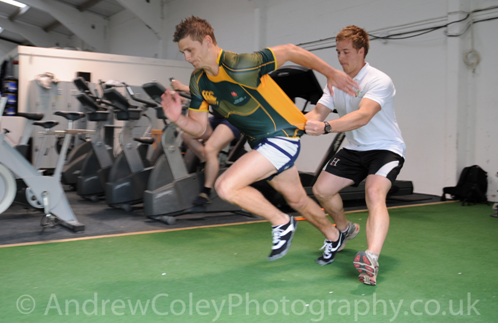
This forward body position means that in terms of ground contact, the player has a positive shin angle (knee in front on toe) and so the force applied back into the ground helps the athlete cover more ground with each step. This breaks the bad habit of over-striding during acceleration and coming up too early. This method is incredibly specific in terms of bridging the gap between gym strength and sport-specific strength. By using resistance, the muscles associated with acceleration are overloaded and will be enhanced.
I have demonstrated “Partner resisted sprints” in the picture above. These are easy to do at the training ground and are a perfect activation drill. There are other alternatives such as uphill sprinting, sprinting up stairs, using resistance bands and sprinting with a sled. If you have access to these items then do try them out.
The important factor to consider here is the load. Research suggests a load of no more than 10% of the sprinters bodyweight should be used in order to correctly carry out the movement. So, don’t let your partner drag you backwards, but merely apply a justified amount of resistance.
5. Reactive and positional acceleration
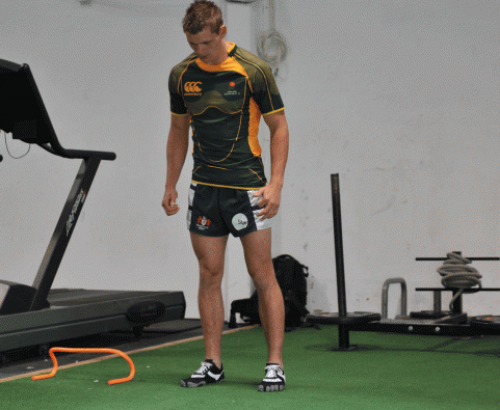
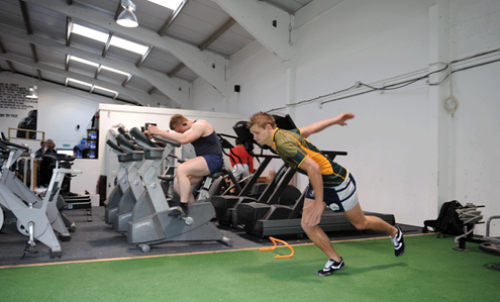
It is more than likely that as a player you will have to accelerate according to some form of cue – whether it is a particular set-play piece or an intercepted ball. These cues vary in terms of their visual and sound application on field. In line with these rugby demands it is a good idea to practice for these in training. From a coaching perspective, varied cues are ideal as you are also enhancing players’ reaction time (another critical component for rugby).
In the example above, I have used a clap sound as the cue. It may also be a good idea to do a movement in the players’ peripheral view, like below:
Notice how Ryan is in different positions for each of these exercises. The reality is that a player will have to react from the most outrageous positions on field and so to increase the crossover of training to on-field play it is a good idea to place players under these demands. This way training is even more rugby-specific.
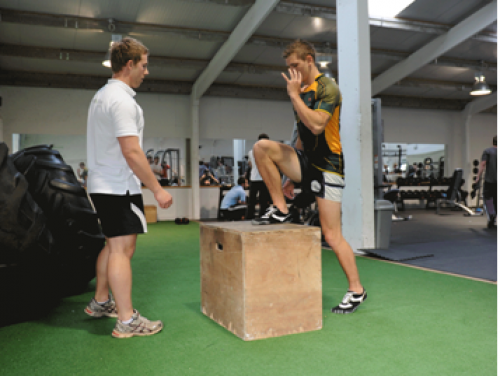
6a. Step-up stability
I have made reference to stability a few times throughout this blog. I cannot emphasize enough how crucial core stability is with regards to carrying out all movement patterns in rugby. It not only enables you to run faster, but also control the ball more efficiently, enhance your contact area management, etc.
The core provides central body control; accordingly your movement patterns are maximized as you have the ability to generate more power. Specific to acceleration is “Step-up stability”.
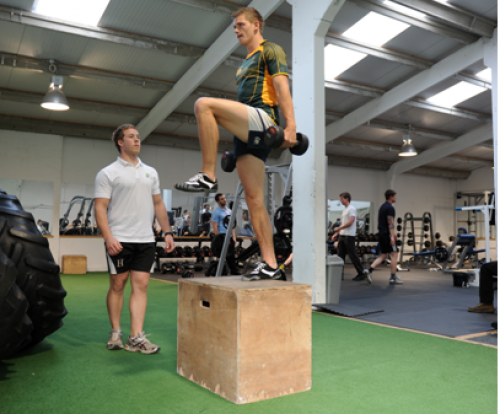
- At the top of the step-up: ensure you pause, gain complete balance for at least a 2-5 seconds and then return to the bottom of the movement where the ground contact should be quick like the “Explosive wall drives”.
- Make sure you are able to complete this movement correctly with a smaller box or step, progressing the step-up height in line with movement efficiency.
6b. Step-up stability with weights
Once you have developed full competency, it is possible to then add a load to the movement such as dumbbells, as in the photo below:
7. Single leg RDL’s
A number of studies suggest that this exercise increases balance, hip stability, hip extension, strength and power production. As such, it should most definitely be included in your workouts.
The movement itself requires you to:
- Balance on one leg;
- Keep your back flat and chest out;
- Shoulder blades retracted; and
- Head in a neutral position whilst levering your torso down towards to floor and keeping the leg in contact with the ground straight.
You will predominantly feel this in your hamstrings, which is perfect as a lot of player training approaches are quad dominant.
In terms of the levering component with this exercise, it is not about going as low as you can but about ensuring your core position stays as suggested throughout the movement.
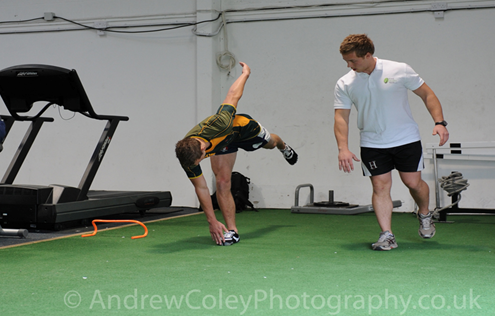
When learning the movement, lever down with both hands towards the ground keeping your shoulders square and parallel to the floor. In the picture above Ryan is carrying out the movement with his right arm, then both arms (shoulders square), then left arm, demonstrating full competency in the movement and his ability regarding the stabilizing component required. Make sure you change legs!
PART 3: Conclusion
The exercises highlighted above are scientifically proven to be beneficial in developing explosive acceleration. By training these movement patterns you are essentially priming the nervous system, working on the neuro-muscular co-ordination required for acceleration and developing more efficient leg power.
Be sure to keep your eyes peeled, as next months blog will include some training video footage and the all new FindRugbyNow Rugby Fitness Competition is due to be officially announced.
I look forward to hearing all of your questions regarding rugby fitness and conditioning. Please email me at Jack@findrugbynow.com and check back here next month for more rugby-specific fitness and conditioning guidance.


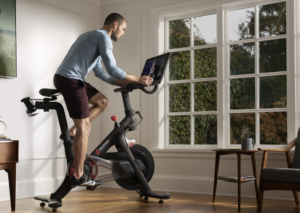 When most people hear the word “Peloton” they think of an expensive black bike with shiny red buttons and that controversial commercial where the husband gifted his wife a Peloton for Christmas.
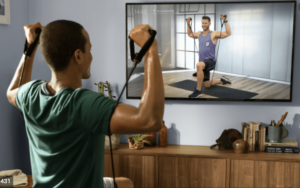 If the app interests you, Peloton is currently offering a 30 day FREE TRIAL, so why not give it a try? Check it out


 This article would not be complete, however, if we did not acknowledge some of the delivery issues that have been plaguing Peloton over the last year. Most of the delivery issues seem to affect U.S. deliveries, however, the UK deliveries have been affected as well.


